
The Blocking Method That Changed Everything for My Lace Projects

I’ll admit it: for QUITE a long time, I didn’t block anything.
I’d finish a project, weave in the ends, and call it done. Sometimes I’d give it a quick steam with an iron if it looked especially crumpled, but that was the extent of my “finishing” process.
Then I made my first lace shawl with fingering-weight yarn.
I followed the pattern carefully, counted every stitch, and when I finished the last row, I held it up to admire my work. It looked... fine. A little bunched up in places. The lace pattern was visible, but not dramatic. The edges curled slightly.
I thought, “Well, that’s just how crochet lace looks.”
A friend who knit lace shawls saw it and asked, “Have you blocked it yet?”
I said no, assuming she meant a quick press with the iron.
She said, “No. Wet block it. Pin it out. You’ll see.”
I was skeptical. But I soaked the shawl in cool water with a little wool wash, squeezed out the excess, and laid it flat on a towel. Then I started pinning.
When I pulled that shawl to its full dimensions and pinned every point of the edging, the lace opened up. The stitches settled into place. The drape transformed from “okay” to “oh.”
I’ve been blocking every fingering weight and lace project ever since.
Why Blocking Matters for Lighter Weight Yarns
Blocking isn’t just cosmetic. It’s structural.
When you crochet with fingering weight or lace weight yarn, your stitches are smaller and more tightly packed than they would be with worsted or bulky yarn. That density means the fabric holds tension differently.
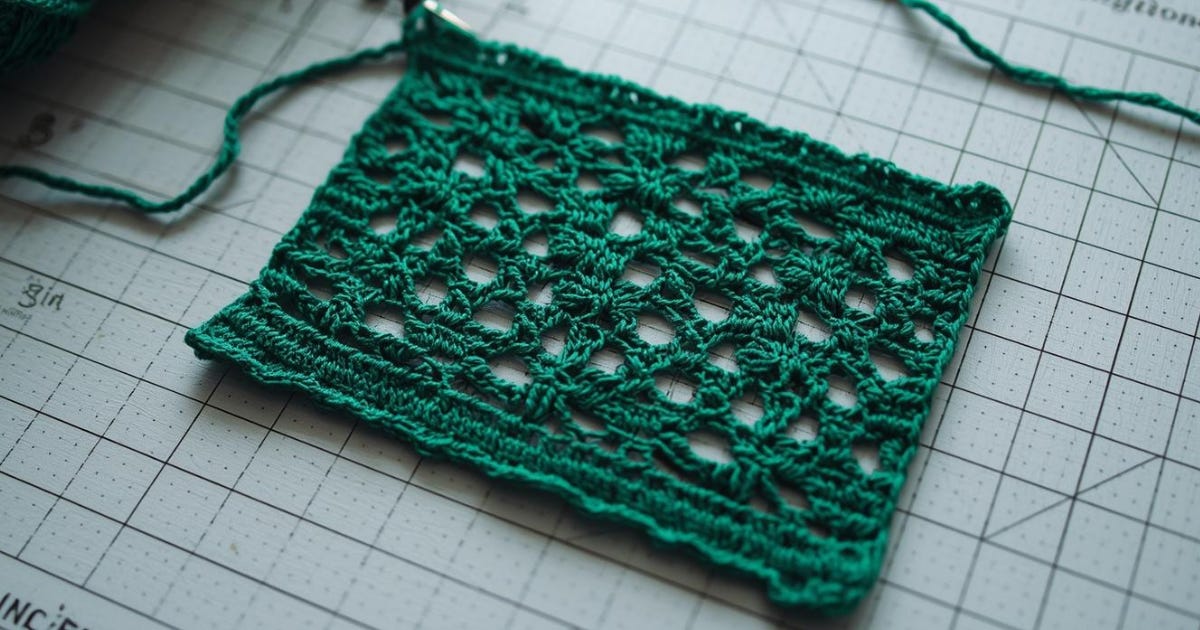
Before blocking, those stitches are sitting exactly where you left them when you pulled the hook through. Some might be slightly tighter than others. The fabric might curl at the edges because of how the stitches stack. Lace patterns—especially ones with chains and picots—don’t fully open until you give them room to breathe.
Wet blocking does three things:
First, it evens out tension. Even if your gauge is consistent, blocking relaxes minor variations and creates a uniform fabric.
Second, it sets the stitches in place. Once the yarn dries in its blocked shape, it stays that way. Your shawl drapes the way you intended. Your garment hangs properly instead of twisting or pulling.
Third, it reveals the lace. If you’ve spent hours working an intricate stitch pattern, blocking is what makes people actually see it. Unblocked lace looks like texture. Blocked lace looks like architecture.
My Blocking Process (Step-by-Step)
This is how I block every fingering weight shawl, wrap, or garment I make. It’s not complicated, but it does require a little time and patience.
Step 1: Soak the project.
I fill a clean basin or sink with cool water and add a small amount of no-rinse wool wash (I use Eucalan or Soak). I submerge the finished project completely and let it soak for at least 15 minutes. This gives the fibers time to relax and absorb water.
If the project is heavily textured or has a lot of surface area (like a large shawl), I sometimes let it soak for 30 minutes.
Step 2: Remove excess water gently.
I don’t wring or twist the fabric. Instead, I lift it out of the water, supporting the weight with both hands, and gently squeeze out as much water as I can without stretching the stitches.
Then I lay the project flat on a clean, dry towel, roll it up like a burrito, and press down to absorb more water. Sometimes I repeat this with a second towel if the first one gets too saturated.
Step 3: Pin it out on blocking mats.
I use interlocking foam blocking mats (the kind that look like puzzle pieces). They’re inexpensive, lightweight, and easy to store.
For shawls, I pin the top edge first to establish the width, then work my way down, pinning each point of the edging to create symmetrical scallops or peaks. For rectangular wraps, I pin the corners first, then the edges, measuring as I go to make sure everything is even.
I use non-rusting T-pins for most projects. For shawls with long, straight edges, I sometimes use blocking wires threaded through the edge stitches—it keeps the edge perfectly straight without needing a pin every inch.
Step 4: Let it dry completely.
This is the hardest part because it requires patience.
I leave the project pinned until it’s fully dry, which can take 24 to 48 hours depending on the yarn fiber and the humidity in the room. I don’t try to speed it up with a fan or heat—I just let it dry naturally.
Once it’s dry, I unpin it. The fabric holds its shape. The lace stays open. The drape is exactly what I wanted.
What I Don’t Do (Common Blocking Mistakes)
I don’t weave in ends before blocking.
Early on, I used to weave in all my ends, then block the project. But I noticed that sometimes the ends would pull awkwardly when I stretched the fabric to pin it out.
Now I leave the ends loose until after blocking. Once the project is dry and unpinned, I weave in the ends. They settle into the fabric more naturally that way.
I don’t skip blocking “just this once.”
It’s tempting to skip blocking on smaller projects or accessories, especially if you’re in a hurry to gift something or wear it. But I’ve learned that even a simple cowl or pair of mitts benefits from a quick soak and shape.
If I’m truly short on time, I’ll at least give the project a soak and lay it flat to dry without pinning. It’s not as precise as full blocking, but it still improves the drape and evens out the tension.
I don’t use steam blocking for lace.
Some fibers respond well to steam blocking (holding a steam iron above the fabric without touching it), but for lace and open stitch patterns, I prefer wet blocking. Steam can flatten delicate textures, and it doesn’t give you the same control over shaping that pinning does.
What You Actually Need (No Fancy Tools Required)
When I started blocking, I thought I needed expensive equipment. I didn’t.
Here’s what I use:
Foam blocking mats (you can find these online or at craft stores—sometimes sold as kids’ play mats)
T-pins (non-rusting, which usually means stainless steel or nickel-plated)
No-rinse wool wash (one bottle lasts me a year)
A measuring tape (to check dimensions as I pin)
Blocking wires (optional, but helpful for long straight edges)
If you’re on a budget, you can substitute. I’ve seen people use clean towels on a carpeted floor instead of mats, and regular sewing pins instead of T-pins (though they rust more easily).
The point is: you don’t need a professional setup to get professional results. You just need to commit to the process.
Why I Still Block After 27 Years
I could skip blocking. I know how my designs will look when they’re finished. I could just fold them up, photograph them unblocked, and move on.
But I don’t.
Because blocking is the moment when a project becomes what it was always supposed to be. It’s when the hours of careful stitch work finally show up the way I intended.
And honestly, there’s something satisfying about pinning out a shawl, walking away, and coming back the next day to see it transformed. It reminds me why I love working with lighter weight yarns in the first place—because the finished fabric is worth the patience.
If you’ve been avoiding blocking, or if you’ve tried it once and found it tedious, I’d encourage you to try it again. Start with something small—a cowl, a simple shawl, a lace square. Soak it, pin it, let it dry, and see what happens.
You might be surprised at the difference.